
Pustomerzha
A friend wanted to play a big game over a weekend. I didn't have the time or energy to find a real battle, but I still wanted to make it as historical as I could.
I decided that as I did not have enough troops suitable as Poles, and didn't want to fight an assault on a fortified position, that the North-Western Theatre provided the best opportunity for a game involving lots of troops on a small frontage.
Terrain
The town of Bolshoi Pustomerzha is just east of Kingisepp, which is the first major town east of Narva on the main railway line towards St Petersburg. It was therefore on the main axis of the North-West Army as it attacked the Reds, and seemed a realistic spot where large forces might have met. It also has quite interesting terrain, which seemed to promise a good battle.
I laid the table (6' by 10'; 1.8m by 3m) using a Soviet 1:100,000 map for the basic details. I did compress it a bit (perhaps 10%) to ensure that the attackers were faced with surrounding pockets of forest.
The river is marked as small but with 2m steep banks. We therefore agreed that troops in it could either hide completely, or use it as an impromptu trench line, and that other troops could fire across the valley over their heads. Cavalry had to dismount to cross, and it was impassable to vehicles and artillery.
The railway line crosses the river just north of the town, and seems to be slightly embanked on the eastern side. That suggests that the stream floods there, so some of the land was made swampy. (There was also some swamp marked on the map for the western edge of the table.)
The whole area is extremely flat, and the "hills" are no more than gentle rises. I placed some smaller hill pieces in the middle of the table basically at random: since the original map only has 10m gradient markings and so small rises do not get marked. In any case, being a valley it was generally possible to see from one side of the table to the other, with only a small "shadow" behind houses and the high crop fields I added.
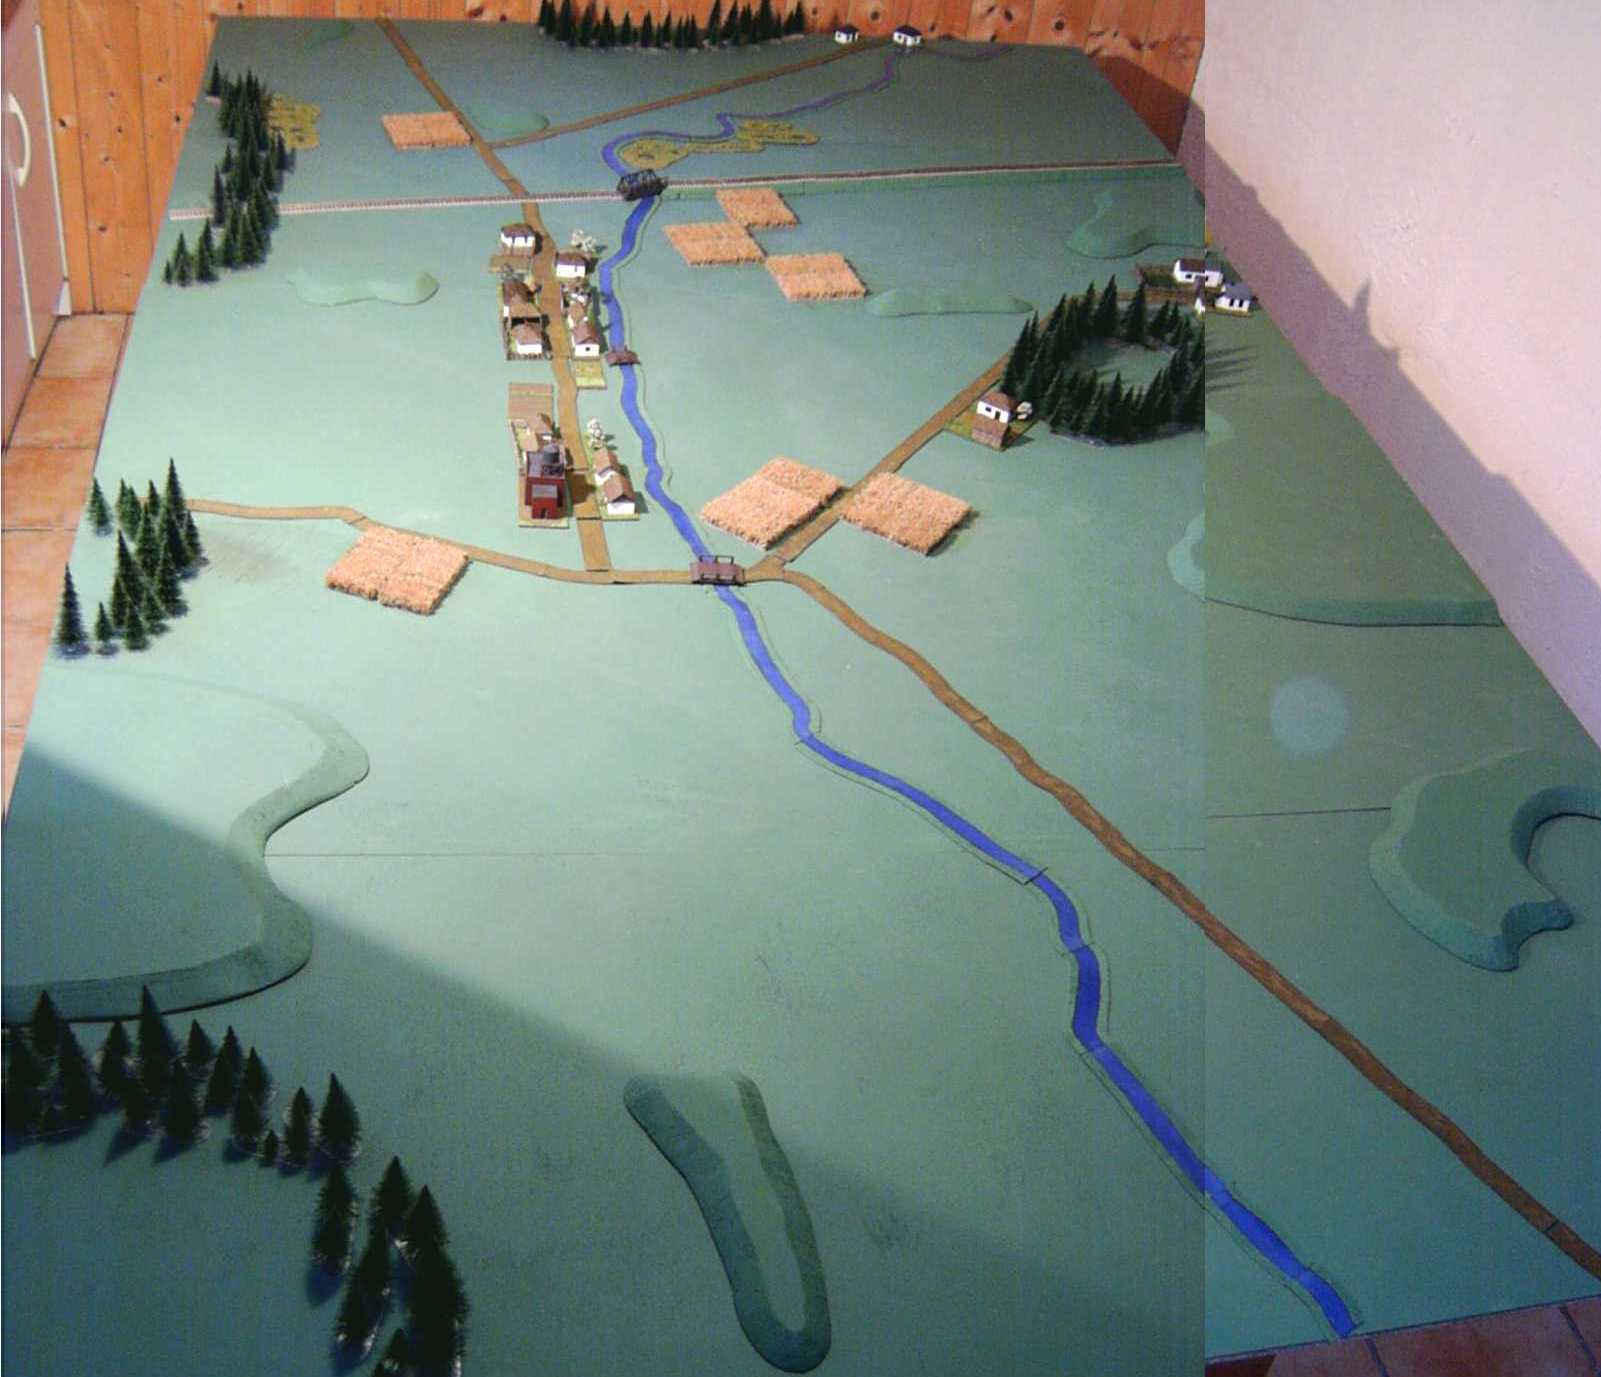
The result was extremely difficult to photograph as the table takes up almost the entire room, but I have tried to show how it was below by pasting together two shots. The town of Bolshoi Pustomerzha is in the centre: it is shown on the 1960 map as taking up the entire strip from the rail bridge to the road bridge, but I assumed that 1919 village was smaller, and I broke it into two sections. To the north (top) is the edge of Old Pustomerzha; to the east (right) the edge of Torma; and the road leading south-east heads to Imenits, just off the bottom of the table.
Scenarios
I decided the Whites would have a division and rolled on my "Iudenich" army list for four regiments. I got two veteran, one officer/conscript and one complete conscript. (I decided that I would use my Guard figures for the veterans and invented a "Reformed Guards" Division to put them in.) The Guard brigade had one regiment of 3-base battalions and one of 4-base, both with 2 MG bases. The Conscript regiments of the division again were split with 3-base and 4-base battalions, but only one MG base each. In a display of completely useless high rolling I managed a field battery in support of each regiment, so slightly over half of my force's 800 points was spent on 8 artillery bases.
The lack of cavalry and the huge amount of artillery forced me to adopt a defensive strategy, but at least I had plenty of places to hide.
Having done that, I thought the attacker would need some 1,000 or so points to be competitive. To ensure that I didn't know what he would get, nor where he would be coming from, I wrote up the scenario as follows:
Yesterday the White "Reformed Guards" Division drove the Red 101st Rifle Division out of Pustomerzha, east towards Torma, seizing the rail bridge over the river. A hasty counter-attack ended up badly for the Reds, who ended up losing a brigade – largely due to the White artillery support, which knocked-out the armoured train supporting the attack. The counter-attack did however manage to partially destroy the rail bridge and a Soviet raiding party managed to destroy a large section of the line further west, which hampers the Whites from bringing forward their resupply, tanks and armoured trains.
You have been sent from HQ, tasked with retaking the rail bridge – which effectively means taking Pustomerzha. You have to do this today, before the damage to the rail line can be fixed and the enemy tanks arrive.
If you cannot take the town, then burning it down would be good, because at least it will deny it to the enemy.
Alternatively, destroying the rail bridge, if engineer support is available, is an option.
You have the remaining brigade of the 101st Rifle Division. It is in bad shape after yesterday's fiasco. The neighbouring divisions have been ordered to supply you with support, but they cannot be relied on. HQ will patch together something as well, hopefully some veterans with heavy weapon support.
The enemy has a division, being some 12-16 smallish battalions. You know they have plentiful artillery and that some of them are veteran.
Soviet Forces
You have a brigade of "Upgraded Conscripts" (9 units of 4 bases each, plus 3 MG bases, one field gun and 4 bases of regimental cavalry) being the remnants of the 101st RD.
To this you should add four further regiments from the "Red Infantry" list, being "shock" on a Western front, but ignoring table 2 [we had so many figures in the game that regiments of mixed morale class was an unnecessary detail]
You should also make two rolls on the following table to represent Army assets sent to assist:
1 – engineer company of 4 veteran bases
2 – battery of 2 heavy howitzers
3 – plane (2 mortars if re-rolled)
4 – cavalry regiment of 3 x 4 bases
5, 6 – armoured car
The 101st is in the Torma area, but the additional regiments appear according to their source, either neighbouring regiments or rushed up the rail line from the rear:
Upgraded conscripts enter – 1, 2, 3, 4 from the Old Pustomerzha (north); 5,6 from Torma area (east)
Regulars enter – 1, 2 from Imenits (south); 4 from Old Pustomerzha;, 5, 6 from Torma area
Veterans enter – 1, 2 from Imenits; 3, 4, 5, 6 from Torma area
Cavalry enter from the eastern half of the table
Heavy support enter along the roads from Old Pustomerzha, Imenits or Torma
I considered giving the Whites a smaller army but allowing them reinforcements to arrive by road or rail. I decided against it because it would just have added unnecessary complication and been difficult to work out the correct balance.
If we had had limited time then White reinforcements would have been an ideal way of ensuring that the Reds attacked with total determination. The arrival after a certain number of moves of tanks or an armoured train could also be a useful way of signalling the end of the game if Pustomerzha has not yet fallen.
The Game
My opponent rolled quite well and got a sailor regiment and three of regulars: all but one of which were 5-base battalions, the other being 4-bases each. His artillery and MG support was minimal however. He had one further unit of cavalry but drew a "Mob" officer to lead them, so they weren't as useful as they should have been. His heavy support was two howitzers – and an armoured car which I blew up with my first shot of the game, so he might as well not have even bothered!
I laid out my defence in a semi-circle, all of it hidden from sight until it fired, moved or was spotted. There were batteries with supporting infantry in each of the forest areas west of the village; there was a battery behind each end of the village on the inside corners; and the bulk of the infantry were in the village or hiding in crops between the village and the artillery in the forests. A few rifle units were pressed forward to the eastern bank to slow down the enemy advance.
The Soviets attacked concentrically – he pretty much had to really since he was coming on that way thanks to the dice rolls he made. Unfortunately for me his largest force was from the south and my defence to the north was considerably stronger.
The actual game went too many moves to describe (perhaps 24 or so) but basically his sailors were eventually able to assault the village. I failed to stand and it was all over very quickly after that. My inability to get reinforcements from the northern end of the village to the southern was a large part of my problem, as he had MGs which recoiled my troops whenever they tried. A few cavalry units would have been extremely useful as a "fire brigade", but sadly I had rolled only for artillery support.
He had been trying to work his way in behind the village from both sides even as he assaulted it frontally: I held off the northern attack fairly easily, but it was pretty tight to the south. Fortunately my artillery advantage came to the rescue there, and a couple of units routed just as he was about to press home. That meant that my line of retreat was not cut off and my retiring (and, far too often, routing) units were therefore able to withdraw to the west without actually being cut off and forced to surrender. A solid victory to the Reds.
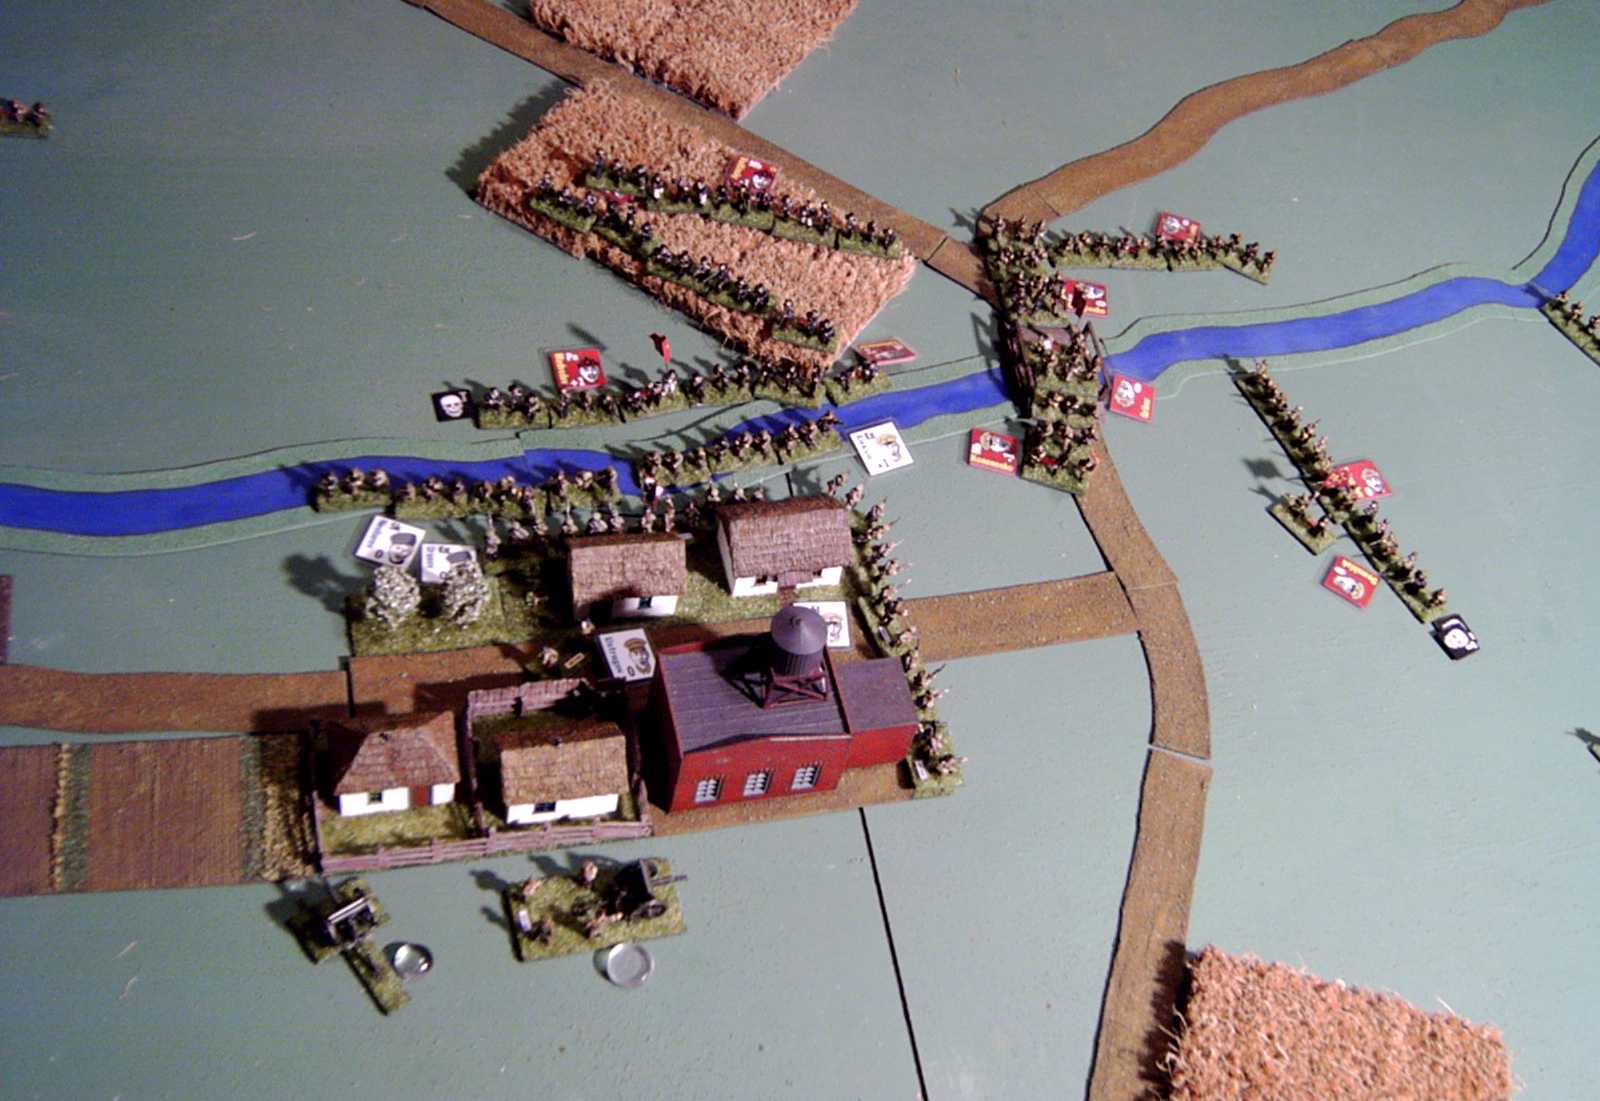
The big assault on the southern end of the town: the White units have white coloured officer chits, and there clearly aren't enough of them!
Thoughts on the Game
I felt the scenario worked pretty well for the amount of troops involved, though I think the attacker was a bit too strong for a "balanced" game (not that either of us cared if it was balanced). Although the benefits of hidden deployment and defending in cover were important, the position itself is not particularly strong – it has two natural "corners", which I normally try to avoid forming in my games, as they allow the opposition to concentrate fire and manoeuvre behind the flank.
Of course it wasn't quick: this took most of a weekend to sort out, what with several hours setting up and packing afterwards. Generally I don't like to play Red Actions! games with so many figures, but Warren lives a long way away and was keen to get in as much action as possible. (We had played three shorter games in his previous weekend visit.) He found the rules intuitive and easy to learn.
As usual a defensive stance in the RCW just wasn't very effective, and normally I would be trying to counter-attack rather than standing in fixed positions. I felt tied to my strategy by my scarcity of decent sized infantry units and total absence of cavalry. But that's one reason why I like random lists – they oblige you to fight with what is at hand, not just your favourite army every time.
Another reason for the use of random lists (plus random entry points) is that I wanted to be left in the dark about my opponent's army composition until I saw it attacking, despite having written the scenario (it helps that most Reds all look the same, so that apart from the sailors, I had no idea of the morale classes I was facing).
We limited artillery consumption to eight rounds (you can see the chits beside the guns in the picture above). It's not necessary if you are playing short games, but once the number of rounds exceeds about 12 there needs to be some limit on the amount of firing.
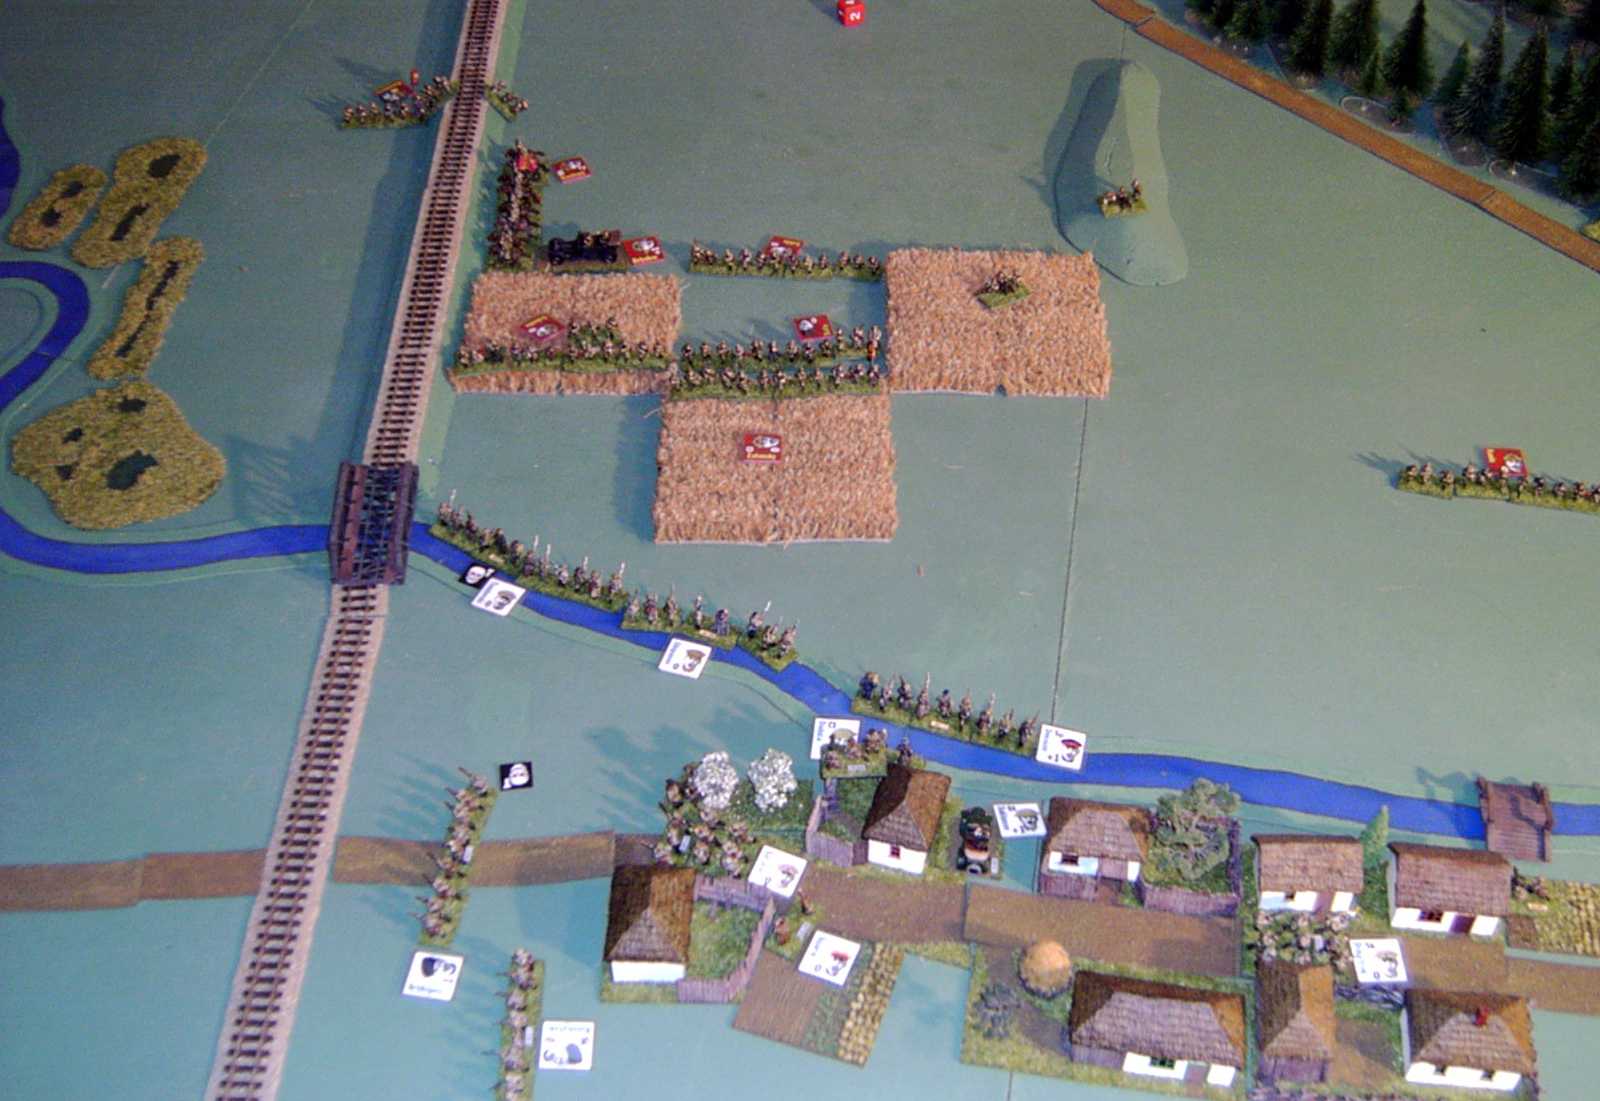
The northern end of the town: the Red troops advancing are Conscripts, and making heavy weather of it. Out of the picture to the left (north) was another regiment, which had entered from Old Pustomerzha.