
Chapchachi Battle Report
I decided that since I was going to post so many pictures, that I would compress them considerably. My apologies for the low resolutions.
I played the game solo, since opposition was lacking where I was in rural France. Generally I dice for situations where several decent options appear possible, rather than tie myself up in knots wondering what to do and how to be fair to both sides. I also use cards to determine the order units move in (at least when playing solo) as it cuts down considerably on the decision time.
As discussed in the scenario page, I used my army lists to generate random armies.
Army selection
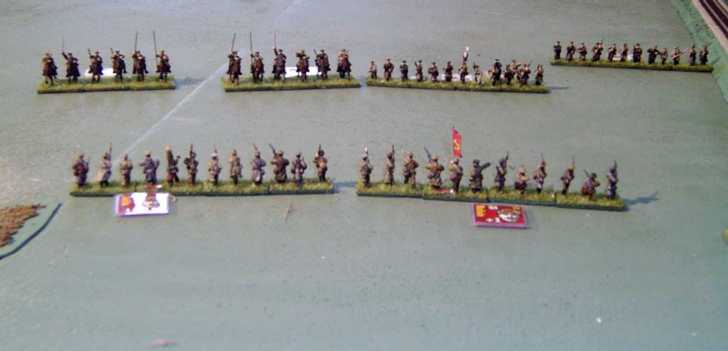
The Cossacks had a nominal points value of 200 on the Cossack Insurgents list, and rolled:
2 companies of plastoons, each 4 bases = 40 points
3 companies of plastoons, each 4 bases = 60 points
1 MG base = 16 points
3 squadrons of Cossacks, each 3 bases = 126 points
Total = 242 points
The total does not exceed the nominal points by more than a single squadron from the last rolled unit so remains quite a lot above the nominal points value (in fact almost as much as it is possible to be above).
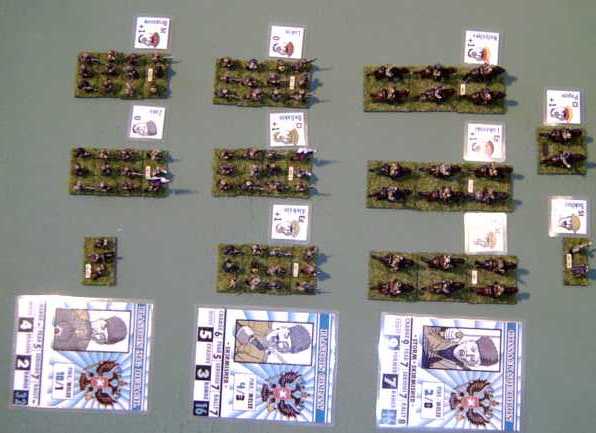
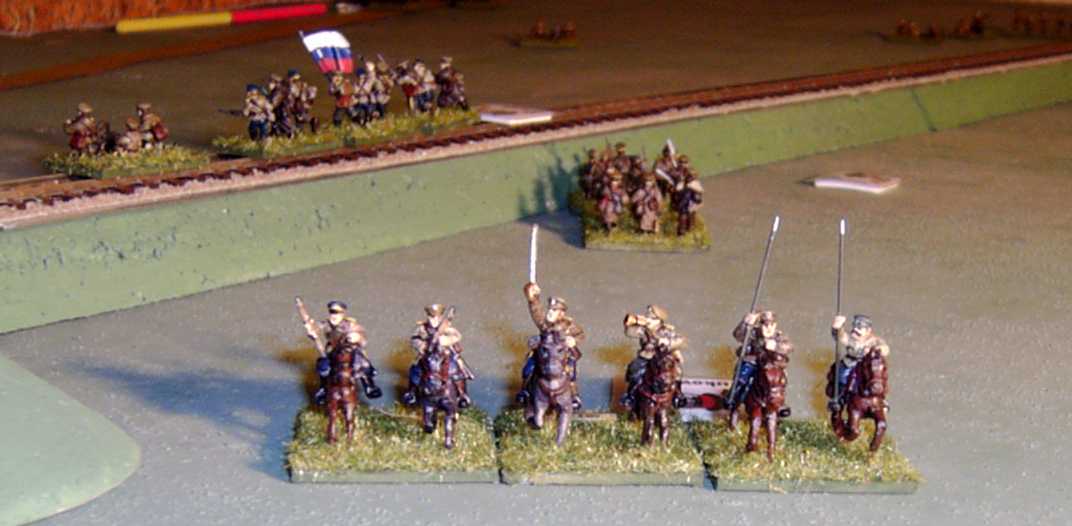
Picture of Cossack forces
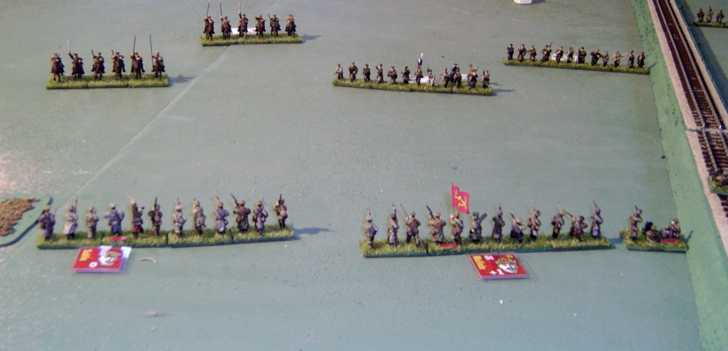
The Reds had a nominal points value of 250, and rolled on the Early Soviets list:
2 companies of Regulars, each 4 bases = 48 points
2 MGs = 32 points
1 field gun = 40 points
2 companies of Red Guards, each 5 bases = 40 points
1 MG = 16 points
1 field gun = 40 points
The total so far is 216 points. This is within 60 of the 250 nominal points chosen, so I got the last unit off table 8 rather than starting from Table 1 again.
3 companies of Conscripts, each 4 bases = 48 points
Total = 264
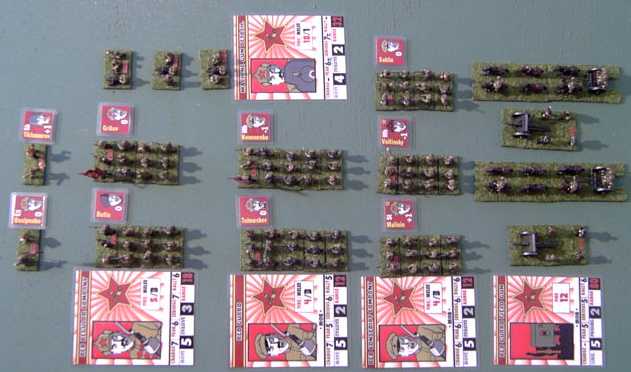
A view of the Red forces
So the Reds got stiffed good and proper on the dicing for units. A theoretical 50 point margin was turned into a 20 point one! Ah well, at least they have the inevitable victory of the Proletariat to console them.
I gave each side a second-in-command: for the Whites I considered him the plastoon regiment's commander; for the Reds he would command the conscripts since they were detached from the main body.
The respective plans
The Reds decided that they would march with their Red Guard, regulars and artillery on the river side of the rail line and assault the town more or less frontally. The artillery was to get to close range, where it might do some damage. Two MGs would accompany the artillery to protect it from assault, while the third would follow the rail line, to support the conscripts if needed. The northern side of the rail line was to be guarded by the conscript battalion, which would retire into the scrub if hard pressed (especially by cavalry) or press on to the town if not opposed.
The Reds plan was pretty simple, but fancy stuff is doubtful with plenty of "mob" characteristics and the commander wanted to avoid any flanks for cavalry to exploit. The assault of the Red Guards would therefore use the river as flank protector and the regulars similarly would use the rail line.
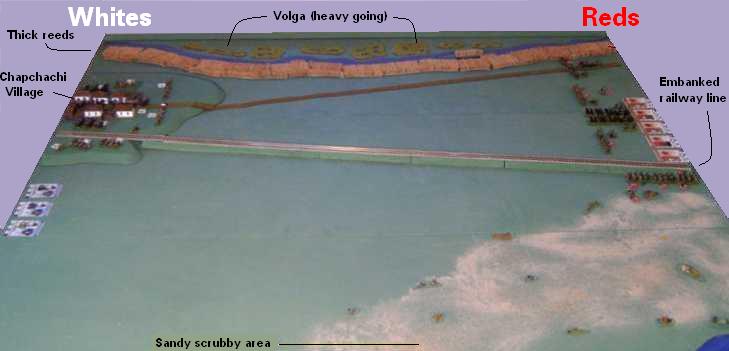
The Whites felt that they would almost certainly have a cavalry advantage, so needed to be at the town in order to be able to cross their mounted troops from one side of the rail line to the other. Therefore they defended as far back as seemed feasible, with the infantry out in front to absorb the enemy's attacks while the cavalry manoeuvred behind for a counter-attack.
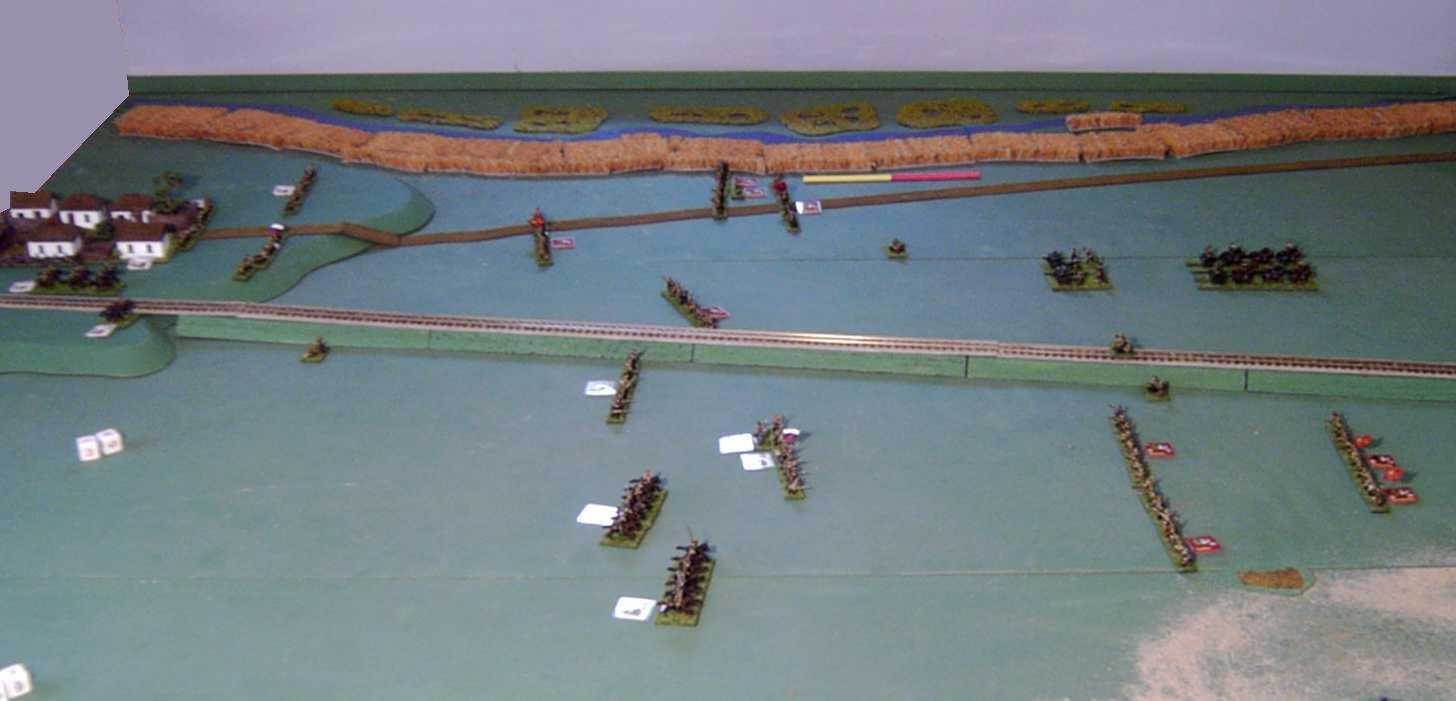
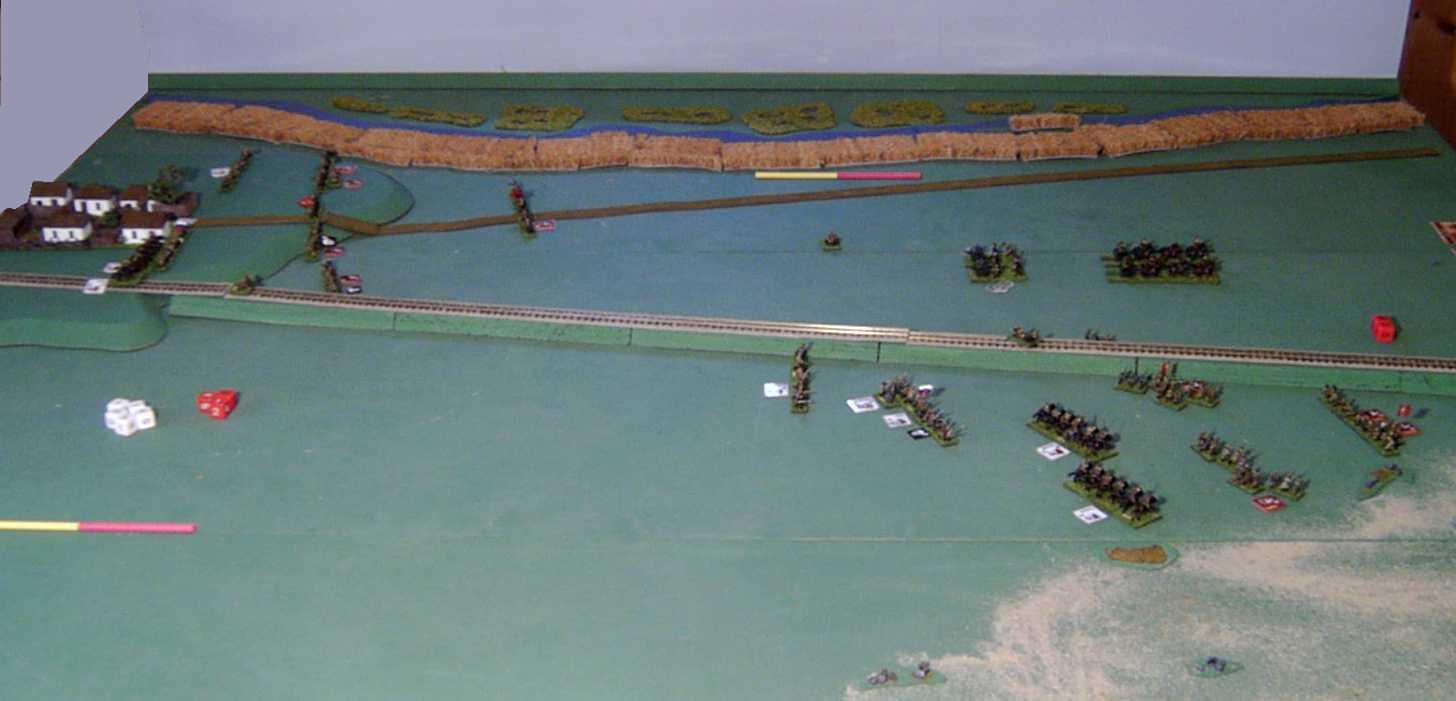
Accordingly, I included the edge of Chapchachi village in the battlefield. My table at home goes up to 10' by 6' but there didnt seem to be any need for such width, so I trimmed it to 8' by 6'. The map below is rotated slightly from the main map, in order to make the Volga roughly parallel to the table edge. (In terms of game play, it would have been better to play down a long table rather than across, but photography is hard enough in the room I have, so that option was ruled out.)

The starting positions, with planned movements
T = 10:00 The Starter's Gun
I deployed as in the map above, everybody crowded on the Volga side of the table.
At this point I decided that the White commander had better come up with a better plan, since he could now clearly see the enemy field guns that would make a defensive strategy hard work. I rolled a d6 for aggressiveness of response, and another for how much to the right flank the counter would be. Two 6's later and he was clearly set on policy of a very aggressive right hook.
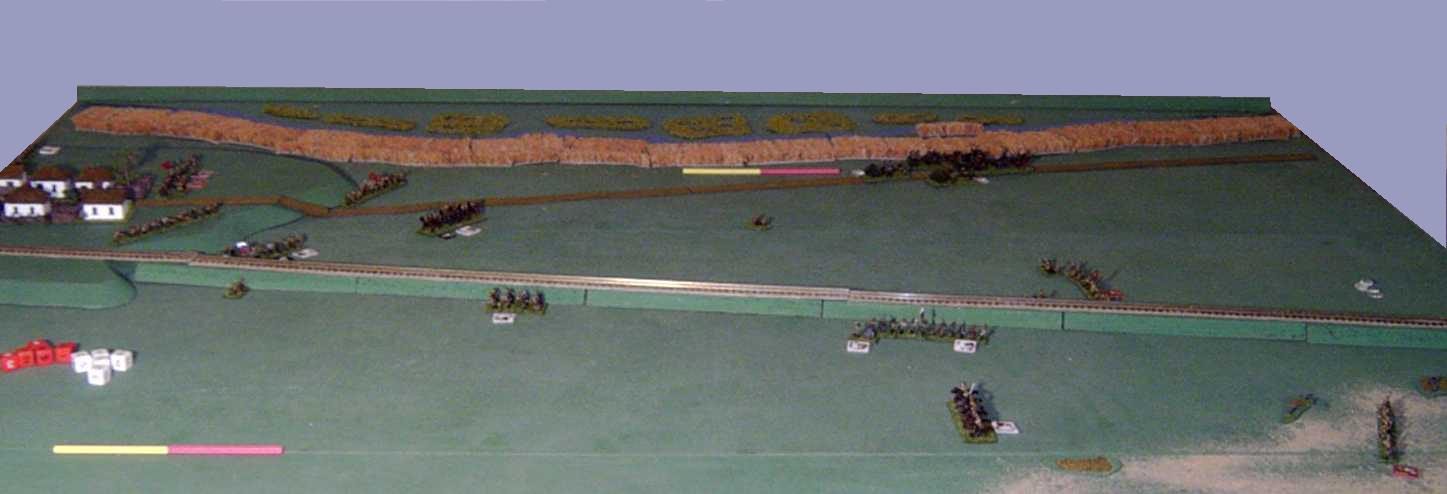
T = 10:20 Nothing much yet
The yellow and red markers in the following pictures are 4" = 100m strips, to help visualise the scale.
I marched the troops up a bit – my only problem with deep tables is that getting into range bit at the start, so I tend to move double distances initially to get it over and done with.
The Red artillery deployed about a kilometre out from the village. This left them at short range and going any closer would be risky, given the enemy attack now developing on the other side of the railway line. The Conscripts facing the Cossack attack held back, so as to be able to use the sandy area as a flank guard.
The Whites rearranged themselves so as to lead with the right.
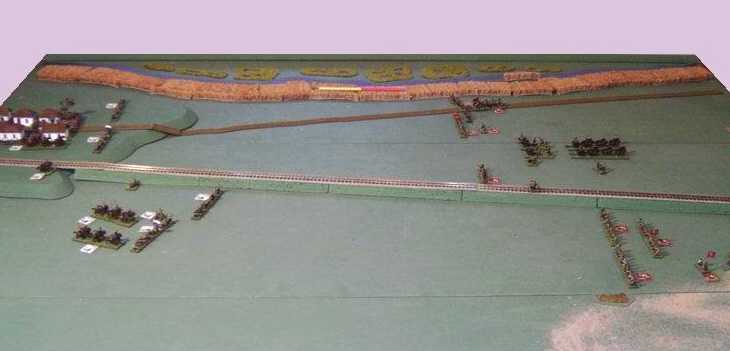
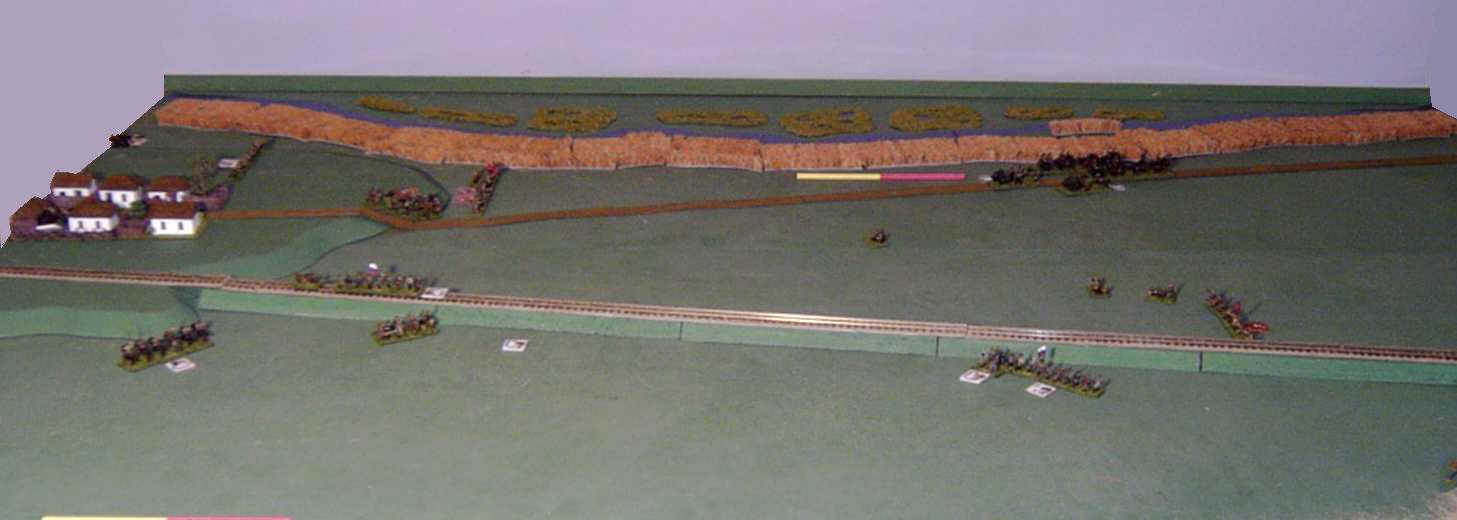
T = 10:40 The attacks close in
By this stage the two various attacks were closing in.
The Red MGs on the railway line had held back one of the advancing Plastoon units and another MG had been sent over in support.
The Red artillery was doing very little damage to the Whites in front of the village though. The "mob" nature of the Red Guard (by the Volga) was starting to annoy the Red commander, so he went over to lead them in person.
 T = 10:45
Things looked pretty grim as the White cavalry deployed ready to charge the conscripts.
(Red infantry of the time were not prepared to deal with cavalry in the open, so it was not promising for them.)
T = 10:50
But shooting from an MG forced the Cossack unit in the middle to retire, and the left-hand Conscript unit threw a big number for its own shooting, causing a Terror and killing the officer from the other Cossack unit. The cavalry was forced to rally from Terror, rather than charge. Meanwhile the two infantry units also coming up retired out of charge reach. Saved!
T = 11:00 Red Conscripts lose their nerve
Oh dear! Maybe not saved!
Ten minutes later the cavalry had moved back up and had a second attempt. This time they both succeeded in charging before the MGs could nail them, and both times the Red infantry broke on their morale check for being charged – and fled. Fortunately for the fleeing conscripts, the cavalry charges started from a long way out, so they were not caught yet, but remain a hundred metres in front of the cavalry squadrons.
To make it worse for the Soviets, one of the MGs was forced to retire back across the rail line by excellent shooting from advancing plastoon infantry.
Still, the attack on the village was going better now, with the Red infantry up onto the higher ground. This mostly obscured the Red gunners' view, preventing any further assistance, but in any case ammunition was running low and they would have to conserve it in case the enemy cavalry wiped out the their left flank. The Red commander was still leading from the front, but the second unit of Red Guards was lagging, having failed a couple of "mob" rolls.
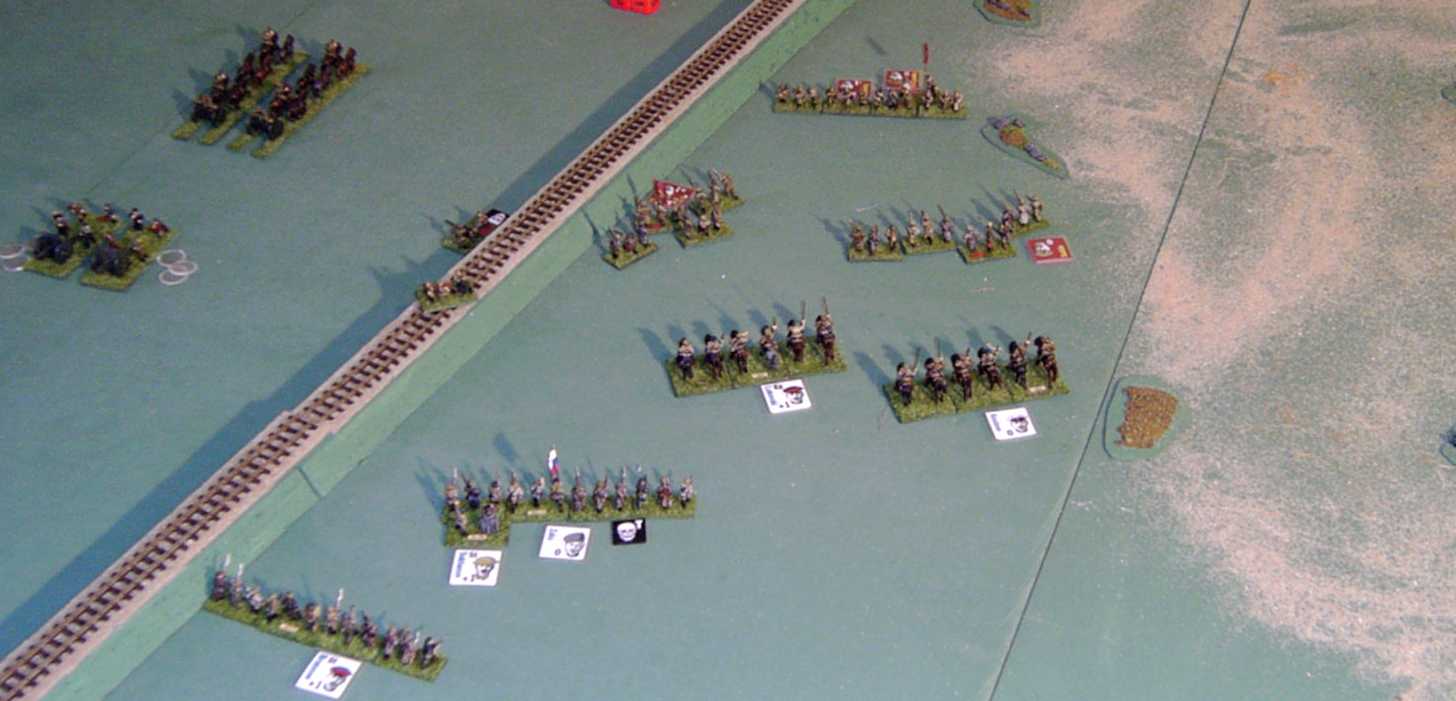
T = 11:20 The village defenders are cleared out
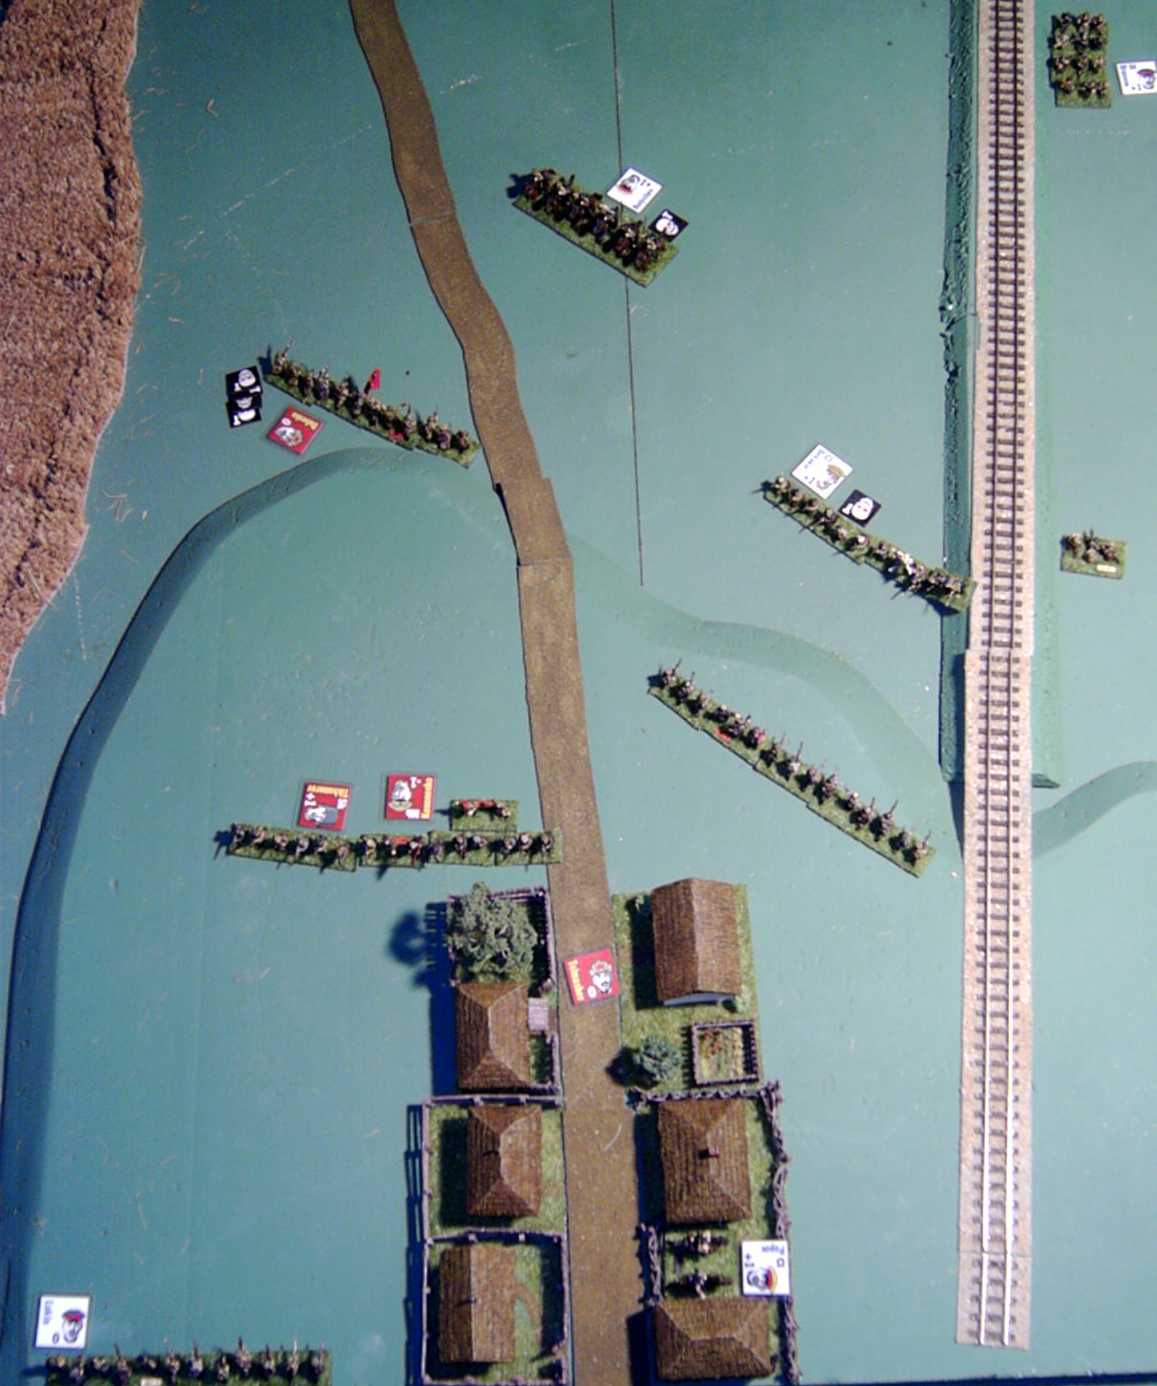
In the next twenty minutes, the lead unit of Red Guard was to charge two units of Plastoons, both of which fled before contact and make a great arc through the end of the village, before coming out the other side to face the remaining unit of plastoons. (See their progress in the picture below.) One of the units of routing plastoons rallied later, the other went off the table when it failed, never to return.
The White MGs failed miserably to hurt the unit just in front of it and were shot off their position twice by long range enemy MG fire.
![]()
Before above: after below.
Meanwhile the cavalry charged out, and once more the infantry broke before contact. The Cossacks pursued the next move, running the infantry down. By now the trailing unit of Red Guard had made it up the hill and the cavalry turned their attention onto the unit which had originally been in the centre. The plastoons facing it had thrown a 12 for shooting, killing the officer and leaving them on four Terror markers. Worse, they failed their "Serious" test and retired back, when they should have been rallying. This was to leave them facing the cavalry with four Terror markers still on (not an ideal situation!).
Elsewhere the Reds weren't doing so well. The last unit of conscripts was charged, and failed and broke. That made six charges declared so far in the game, with each time the chargers passing and each time the receivers failing! The infantry were quickly run over. The two other conscript units rallied, but now had to wait two turns not advancing for every turn spent routing (one of my "house" rules, required largely because the deeper tables make it so much less likely to rout off-table) and so weren't going anywhere for a while.
The Cossacks had now largely cleared the north side of the railway line (only one tired enemy unit left rallying in the scrub) and set off in various directions to help their fellows. The infantry trying to cross the railroad line were shot back by Red MGs, while the others headed back down the line to the town. One cavalry unit dismounted to cross at the extreme table edge, the other rode back towards the village.
The Red artillery during this time chose to limber and re-deploy on the road, further away from the danger area. They are the black smudge on the road by the reeds.
T = 11:40 The Soviets withdraw
The White cavalry by the village charged the terrified Red infantry, who stood and scored a "retire" result for shooting. Rather than take that the Cossacks used their "Storm" characteristic to lose a base and charge. They threw low, but were at massively better factors and the extra terror markers pushed the infantry over the edge: they routed and were cut down. The Red Guard nearby took no notice and their shooting in the next move removed another Cossack cavalry base – leaving one base only in the unit, and that with a terror marker still on it. That was that cavalry squadron out of the game.
Meanwhile the other Red Guard unit and the MGs firing from deep forced the last remaining White unit back onto the rail line.
At this point the Reds decided to quit before the White reinforcements from the eastern side of the line could make themselves felt at the village. They elected to withdraw, covered by their MGs and artillery, and headed back down the road. I ruled that the Cossacks troops were too spread out to organise a counter thrust at this point (the one unit in a genuinely threatening position was the unit between the village and the river, but since it had already routed once in the game, I felt it was unlikely to take too many chances with a hot pursuit).
Conclusion
Red Losses:
2 units of Red Regulars, run down by cavalry
1 unit of Red Conscripts, run down by cavalry
White Losses:
1 unit of Plastoons, routed away without being touched
2 bases of Cossack cavalry, shot
1 base of Plastoon foot, direct hit by artillery
As I suspected, the terrain favoured the defenders, as they were able to concentrate on one half of the battlefield while avoiding the Red MGs and artillery. The Soviets were meant to have a substantial points advantage to compensate, but that didn't turn out that way. Maybe next time.
Even then it was close enough. The Soviet dice certainly failed spectacularly at times – especially when being faced by cavalry. It should have taken much longer for the cavalry to clear out the conscripts than it did, and it was the returning troops from that which forced the Red Guard to abandon the field, not the troops they were actually facing around the village. Some better shooting from the Red Artillery would have helped as well – it waited until the final move before finally scoring a direct hit.
I decided afterwards that I should also have put more of the village on the table. It was awkward playing so close to the edge.
Victorious Astrakhan Cossacks